

Torres del Paine
If you’re reading this, I hope you’re considering a trek in Torres del Paine, or maybe you’re already planning it! This stunning national park in Chile’s Magallanes region of Patagonia is absolutely mind-blowing and is accessible for both experienced trekkers or beginners.
We decided to visit Patagonia in the final two weeks before winter hit. We went at the end of April, which is pretty much the cut-off point for hiking season. Our first stop was Puerto Natales, a small, town in southern Chile and the main base for exploring Torres del Paine National Park.
Puerto Natales, the base for Torres del Paine
How We Got to Puerto Natales
We left from Cusco, Peru, and getting to Patagonia wasn’t exactly straightforward. In total, it took us four flights over two full travel days to reach Puerto Natales.
If you have more time, a cheaper route is to take a bus to Santiago and then fly down from there. But since we were short on time, flights were the only realistic option.
Once we finally landed in Puerto Natales Airport, it was thankfully super easy to get into town. There are a few options:
-
Uber: We paid 7000 CLP (about 7-8 USD)
-
Local buses: Also available and very affordable
Where to Stay: Park or Town?
You’ve got two main options:
-
Stay inside Torres del Paine National Park, or
-
Base yourself in Puerto Natales and take buses to the park each day
Let me be real, staying in the park is insanely expensive. Even dorm-style refugios or camping spots can cost over $100 per night, and full board lodges are hundreds more. Definitely not ideal for budget travellers. We opted to stay in Puerto Natales and take the early morning buses into the park. Yes, it means a 2-hour bus ride each way, but overall it was still way cheaper.
We stayed at Natales Trip, a cozy and affordable guesthouse for $40.50 USD per night. It had a small kitchen (which helped us cook our own meals) and warm showers. The town itself gave off Alaskan lake town energy, windy, quiet, but charming, especially with the autumn vibes. Plus, it was super convenient for us as it was very close to the bus station.
SIM Card Saga
This one was… frustrating. Trying to find a SIM card in Puerto Natales felt like a treasure hunt, with no treasure. We went to at least 9 stores, and every time they sent us somewhere else. The issue? Most prepaid SIMs require a Chilean ID, which we obviously didn’t have.
If you’re planning ahead, definitely buy a SIM card in Santiago, either at the airport or in the city. There are lots of small stores and kiosks where you can pick one up.
My phone also doesn’t support eSIM, so that option was off the table. Double-check if yours does before you go, it’ll save you a lot of trouble.
Important Park Information
Entrance Ticket
-
Price: $32 USD per person (foreigners), valid for 3 consecutive days
-
Where to buy: Online (recommended for convenience) or at the park entrance (Laguna Amarga)
Tip: Always have your ticket saved offline, because once you get close to the park, there’s almost no phone signal.
Getting to the Park
We recommend Bus-Sur because it stops at all major points inside the park. Other companies sometimes require a transfer to Bus-Sur if you want to stop at other stops further in the park, which is extra hassle. You can buy the bus tickets at the bus station the day before in low season. In high season, I recommend buying them online in advance (3 dollars surcharge). All the buses to the park leave at 7am in the morning.
Here is the schedule for Bus-Sur:

Tip: Sit by the window during the ride, you can spot wild animals like jackrabbits and foxes!
Recommended Day Treks
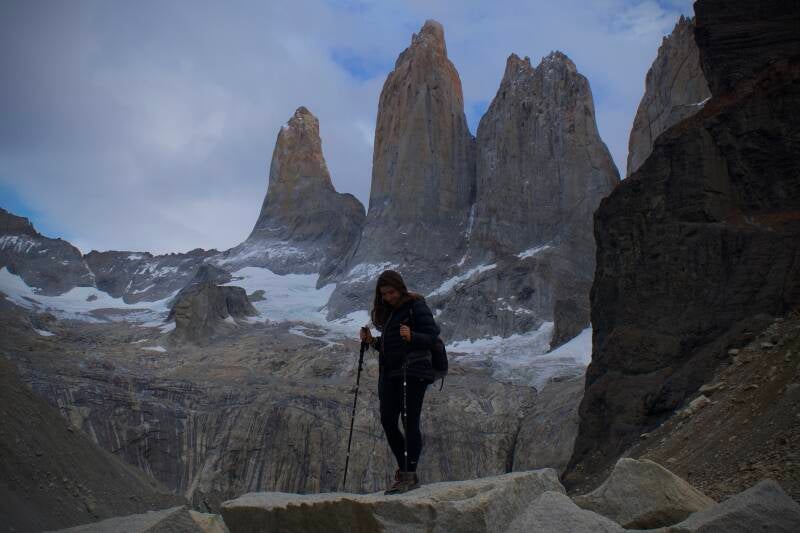
Day 1: Mirador Base de las Torres Hike
The hike to Mirador Base de las Torres is probably the most iconic trek in Torres del Paine.
Step by step instructions to get to the trail:
-
Take the bus from Puerto Natales to the Laguna Amarga stop (25 dollars round-trip), which takes around 2h: Get off at the park entrance where they check your CONAF park entry tickets.
-
Show or buy your entrance ticket: They’ll check your online reservation or sell you a ticket if you haven’t bought one yet.
-
Catch the shuttle bus to the Las Torres sector:
-
Where: Look for white vans or buses with a Torres del Paine logo or ask
-
Cost: 4500 Chilean pesos (about $5 USD)
-
Cash only!
-
Duration: 10–15 minutes ride
-
From the Las Torres Visitor Centre, the trail starts!
About the Hike:
- Distance: 22 km round trip
-
Elevation gain: 800 meters
-
Difficulty: Moderate to difficult (especially the final ascent to the viewpoint)
-
Time needed: We took about 4 hours to hike up and 3 hours 45 minutes down
-
Trail hours: You need to start early, because the trail closes around 2:00–2:30 PM at the checkpoint
Tip: Bring enough food, water, and warm clothes, Patagonian weather changes fast.
Here is the GPX download. You might not need it as the trails are very well marked.
https://nl.wikiloc.com/routes-wandelen/mirador-base-de-las-torres-21032181


Getting Back After the Hike:
-
Return shuttle buses from Visitor Centre to Laguna Amarga: 2:00 PM and 7:00 PM only
-
Cost: 4500 CLP (cash)
-
Important: Don’t miss the 7:00 PM shuttle, or you’ll be stuck at the park overnight!
We caught the 7:00 PM shuttle and hopped on the 8:15 PM Bus-Sur bus back to Puerto Natales.
While waiting for our evening shuttle after the hike, we noticed a small group gathering outside the Visitor Centre. We asked the driver if we had a few minutes, and when we ran over, we saw a wild puma! Not just one, but two pumas casually walking just a few meters away from the group. They didn’t seem bothered at all by the people around them.
A few notes about puma sightings:
-
Dusk and dawn are the best times to spot them naturally
-
There are special puma tracking tours with a 90–100% chance of seeing them (but they’re expensive)
-
We didn’t do a tour, seeing them by pure luck felt really amazing
We also spotted jackrabbits and foxes that day during our bus ride.
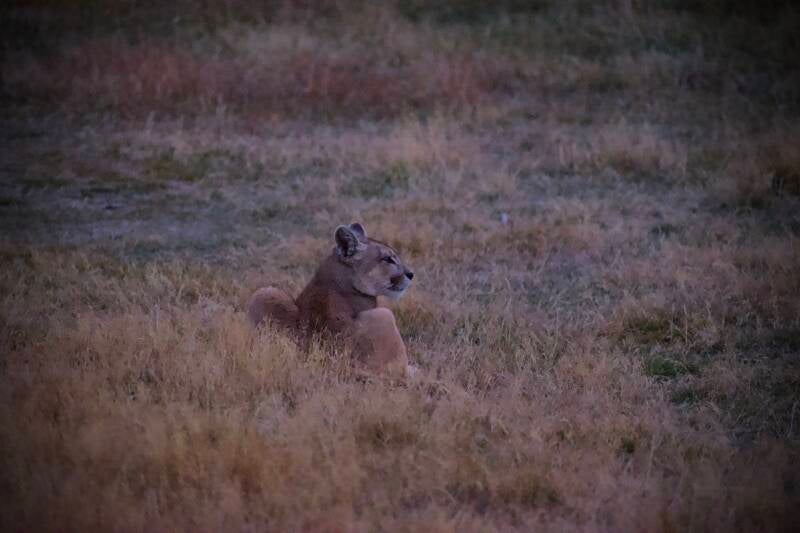
Andean mountain lion (Puma concolor concolor)
Day 2: Mirador Condor & Mirador Cuernos
We originally bought the Base Torres bus ticket (around 20 USD per person) thinking it would drop us off near Camping Pehoé for the Mirador Condor hike.
However, at Laguna Amarga, you’re supposed to transfer to a Bus-Sur bus using the same ticket, something we didn’t know.
Because of this confusion, the trip ended up taking almost 4 hours, with the bus stopping for long waits at random places. It is better to immediately buy a Bus-Sur ticket instead.
Tip: If your main goal is Mirador Cuernos, it’s better to book a direct bus (Bus-Sur) to Pudeto instead.
Hike 1: Mirador Condor
-
Starting point: Camping Pehoé
-
Distance/Elevation: Short hike, about 30 minutes up, 200 meters altitude gain
-
Difficulty: Steep but manageable
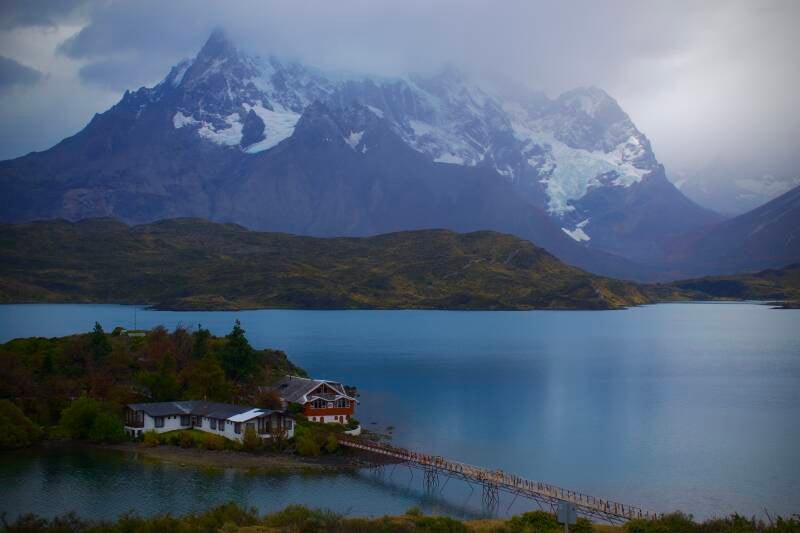
The trail climbs quickly but rewards you with views over Lago Pehoé and the surrounding mountains. For an even better perspective, walk five minutes from the campground to a nearby hotel. Here you’ll find a path leading to a small hilltop and the Salto Chico Falls.

Hike 2: Mirador Cuernos
After finishing Mirador Condor, we needed to get to Pudeto for the Mirador Cuernos hike. The two points are about 7 km apart, walking would take too long, so we decided to try hitchhiking. It wasn’t easy at first, but eventually a large truck picked us up and gave us a lift (a pretty unique experience!).
-
Starting point: Pudeto
-
Distance/Elevation: Easy hike, about 2 hours round-trip
-
Difficulty: Very easy, mostly flat
This hike is much more relaxed and winds along the lake’s edge with constant views of the iconic Cuernos del Paine. Along the way, we heard ice calving from the distant glaciers.


Return to Puerto Natales:
After finishing at Pudeto, we caught the Base Torres bus back to Puerto Natales without needing another transfer.
The bus leaves from Pudeto at 7:30 PM.
Wildlife Spotted:
-
Guanacos (wild llamas) on the bus
Day 3: Mirador Ferrier
We took the 6:50 AM Bus-Sur from Puerto Natales to Hotel Lago Grey, the last stop. From there, it’s a short walk to the visitors centre, where the Mirador Ferrier trail starts. Important: You must register at the ranger station before and after your hike.
- Distance/Elevation: 2.5 km one-way, 600 meters altitude gain in 1.5km
-
Difficulty: Very steep, challenging
This was one of the steepest climb we’ve ever done, a brutal workout where the trail goes almost straight up. It took us 1 hour 45 minutes to summit and 1 hour 20 minutes to descend. At the top, you have a panoramic view of Glacier Grey and the Patagonian Ice Field, without needing to pay the expensive $100 boat tour.
After the hike, we wandered down to the lakeshore and an Andean condor landed right in front of us. It was our second major wildlife encounter after seeing pumas earlier in the trip. On the bus back, we also spotted a black-chested buzzard-eagle from the window.
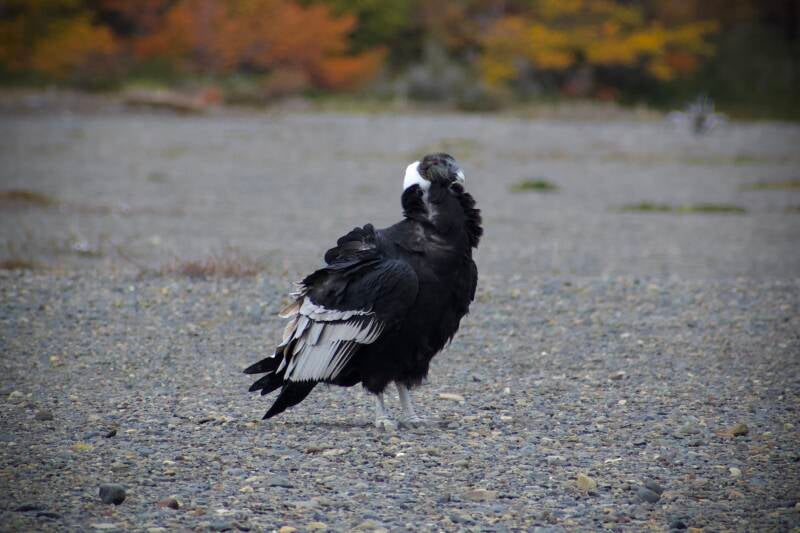
Andean condor (Vultur gryphus)
Return to Puerto Natales:
The return bus picks up at the visitors centre café at 5:15 PM. Make sure you’re back in time, it’s not the same place you get dropped off!
Final Thoughts
Torres del Paine ended up being one of my absolute favourite places during our South America trip. The landscapes are just incredible, and the wildlife encounters made it even more special. Even though Patagonia has a reputation for being expensive, the Chilean side is definitely doable on a budget with a bit of planning. If you’re thinking about visiting, do it. It’s so worth it!
Create Your Own Website With JouwWeb